Why Every RVer Should Own a 3D Printer
Are you someone who loves doing “mods” to your RV?
Are you a “tinkerer”?
Do you like having FUN?
If you answered “YES” to any of these questions, then consider getting a 3D printer for your RV.
Hear me out. When my wife, Kasie, bought her first 3D printer a couple of years ago, I was skeptical. “Aren’t they expensive?” “Why don’t you just buy whatever you need?” Seems like a lot of work, I said. Looks daunting, I told her.
Turns out, 3D printers have come a long way since I first heard about them during undergrad in the 1990s. Today, 3D printing (and the FREE software that people use to 3D-print things) is cheap, easy, functional, and fun. In other words, today’s 3D printers are not your grandma’s 3D printer.
When we decided to live full-time in our RV over 16 months ago, we each got to choose a couple of hobbies that we could take with us. I chose a guitar and a keyboard. Kasie chose her 3D printer and some golf clubs. Of all of those things, we use the 3D printer the most. In fact, of all the RV tools, gizmos, and gadgets that we carry with us, the 3D printer might be the one that we use the most.
Let me say it again: 3D printing = Cheap + Easy + Functional + Fun
What Type of 3D Printer the Best?
You can spend a lot of money on a 3D printer, but you can also spend just a few hundred dollars. Kasie’s favorite 3D printer (and the one that we currently have in our RV) is the Ender 3 V2 Neo (Ender). It costs about $250. She’s owned more expensive 3D printers, but we think this one from Creality is the best bang for the buck. The Ender has an auto-leveling function, but Kasie recently purchased a bed leveling tool. Given that the printer giggles down the road after every trip, she’s gotten into the habit of using the bed leveling tool if we have moved campgrounds between print projects.
Keep in mind that our Ender 3D printer is really a “beginner” 3D printer. It will only print in one color, it’s relatively slow (compared to some high end printers), and the size of the objects that it can print is limited by the size of the device. Yet, it’s done the job admirably for the projects we’ve needed. Moreover, the Ender fits nicely in the top bunk of our RV, and the size is a plus as far as we are concerned.
Of course, to print something, you have to have some filament. PLA, ASA, TPU, and PETG are all popular options. After experimenting with all of these filaments, we think that PLA works for most applications. So, if you are just getting started, we suggest trying PLA as your filament.


Of course, there’s all sorts of gadgets that can be used with a 3D printer. Kasie recently purchased an electronic bed leveling tool, and she re-levels the bed each time we move campgrounds. A deblurring tool is also handy to remove supports. Supports are material that is used to support the desired item during the print, but the material is removed and discarded after the print.


2024 Update: Kasie upgraded to the Bambu Lab X1 Carbon 3D Printer (~$1200). She also bought the AMS to make printing multiple colors easier. SHE LOVES THIS PRINTER! It is much easier to use, especially because she doesn’t have to level the bed all of the time. Plus, she can even take video of her prints! If you have money to burn and KNOW that you are going to like 3D printing, she highly recommends just starting with this 3D printer.
3d print of a Super C
Why Should RVers Own a 3D Printer?
RVs come in all shapes and sizes. The way people camp or live in an RV is just as varied. The best part about owning a 3D printer is you have the ability to create something that works for you and your space. Every RVer knows that space is limited, and organization is at a premium. In my view, there’s nothing better that having the ability to create an object that fits into the space and functions just the way you want it to.
In short, a 3D printer is all about CUSTOMIZATION! We live in just a few hundred square feet, and it’s SO WORTH it to be able to use the space properly.
Also, if you are looking for a GREAT GIFT for someone who has an RV, I personally think that a 3D printer should be at the top of your list. A 3D printer is perfect for someone who likes to tinker (or just get organized in a small space). Plus, one benefit of giving a 3D printer to someone is that you usually benefit from all of the cool stuff that he/she prints.
What Can You Print with a 3D Print for Your RV?
Kasie has printed dozens of things that we use daily in our RV (a 2022 Entegra Accolade XL 37L). Many of these designs are freely available on Thingiverse. To make modifications to these designs, she uses Tinkercad and Utilimaker Cura, both of which are also free to use. I decided to play around with the software as part of writing this blog. All of this software is pretty user-intuitive. Within couple of days of playing around with the software, most people will get the hang of it.
This blog is not intended to be a tutorial on how to use a 3D printer or 3D printer software. Instead, we just hope that after seeing some of the neat things Kasie has 3D printed, that might inspire you to start 3D printing on your own. In alphabetical order (drum roll, please):
Fan Extender (for short people!) (MY FAVORITE a/k/a “THE KASIE”)
Where possible, I’ve tried to include the .STL files for the items that Kasie has 3D printed. Just click on the Tinkercad drawing of the object, and the .STL file should be there. If not, shoot me an email at classcbroads@gmail.com, and I’ll see what I can do.
DISCLAIMERS: EVERY RV IS DIFFERENT. THESE DESIGNS MAY NOT (AND PROBABLY WILL NOT) WORK FOR YOUR SPECIFIC NEED. YOU MAY (AND PROBABLY WILL) NEED TO MODIFY THESE DESIGNS OR CREATE YOUR OWN. PLEASE DO YOUR OWN RESEARCH AND CHECK ALL MEASUREMENTS AND DESIGNS. WE ARE NOT RESPONSIBLE FOR YOUR RIG OR ANY OF YOUR 3D PRINTING PROJECTS! We simply want to share some of the things that we have successfully 3D printed for our RV to hopefully inspire people pick up 3D printing. Also, we do get a very small commission at no cost to you if you use one of the Amazon Links (a/k/a beer money).
**All .stl files are licensed pursuant to CC-BY 4.0 so if you share or modify them, please provide attribution to ClassCBroads.com and the original designer, if applicable.
Good luck, and may the 3D-print gods be with you!
Baby Gate End Receptacle
We don’t have a baby, but we have FIVE DOGS! Because a couple of our pups are “runners,” we usually set up a baby gate near the door to keep the dogs in the RV. To help with the baby gate placement when we get to a new location, Kasie 3D-printed these receptacles for the baby gate ends. The receptacles are screwed into the wall.
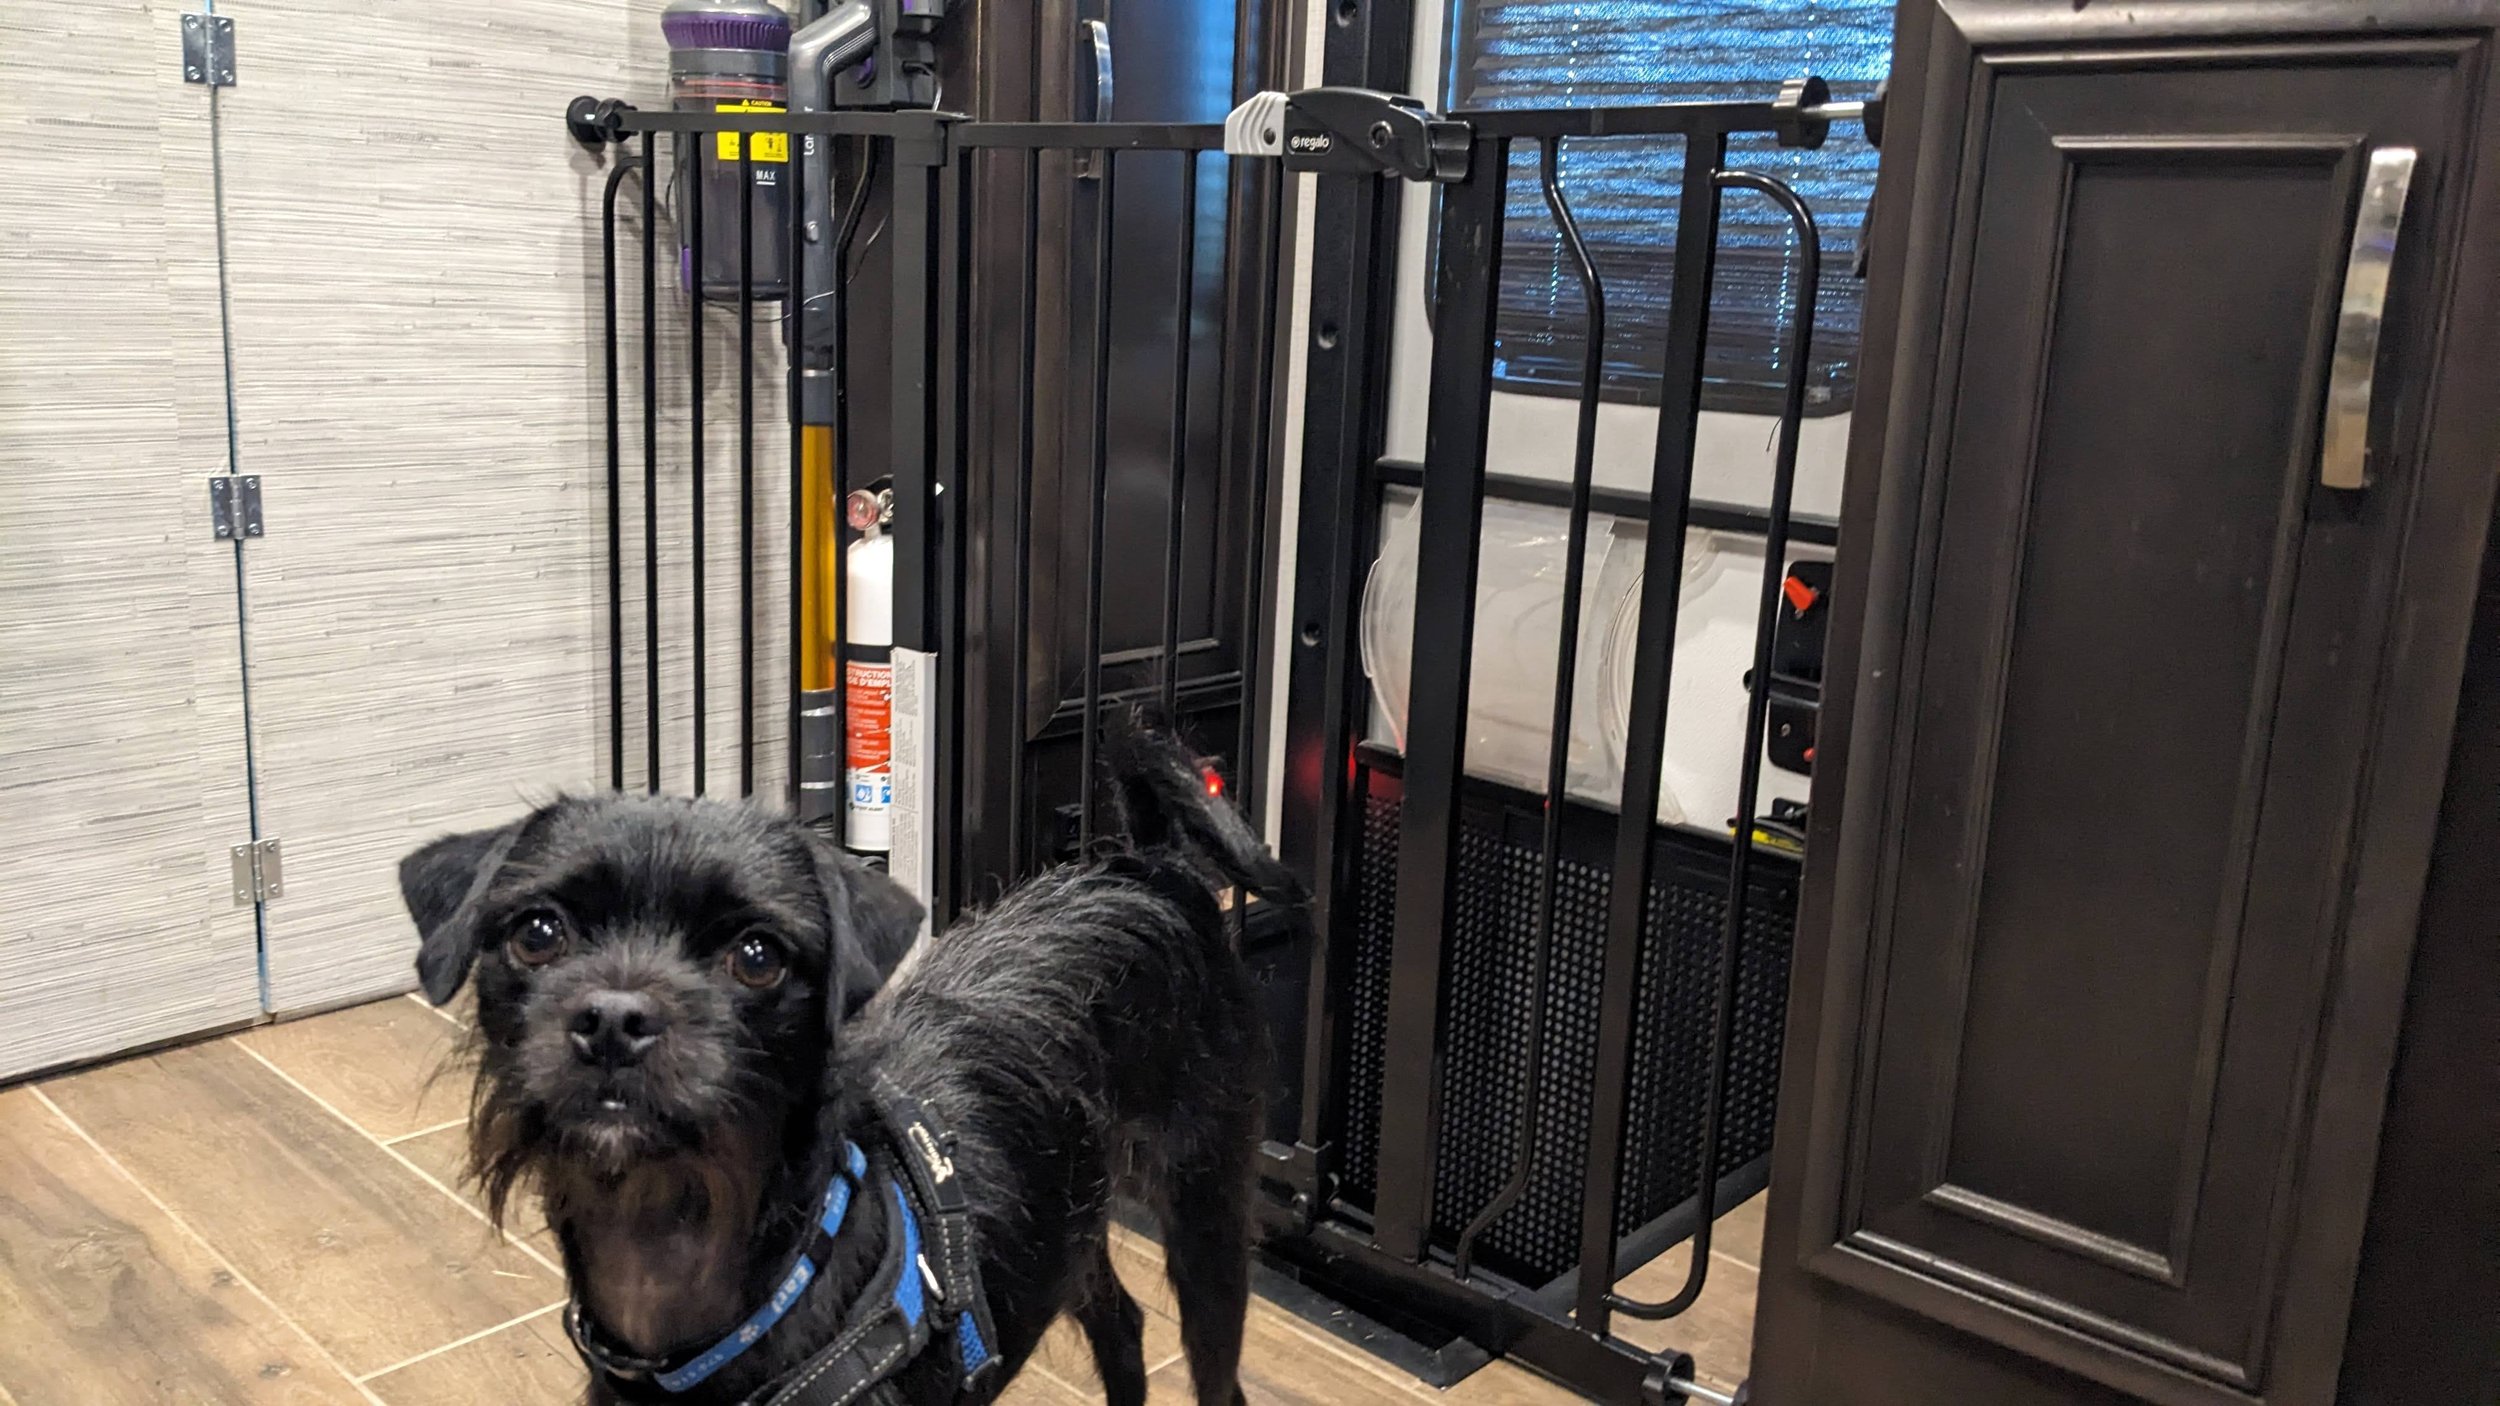
We have a baby gate by our RV door to help keep our dogs in the RV. Earl, I’m talking to you, buddy!


Baby Gate Foot receptacle in our RV — 3D Printed

Baby Gate Receptacle for receiving the “feet” / extenders of a baby gate
Click on the image above for the .STL file
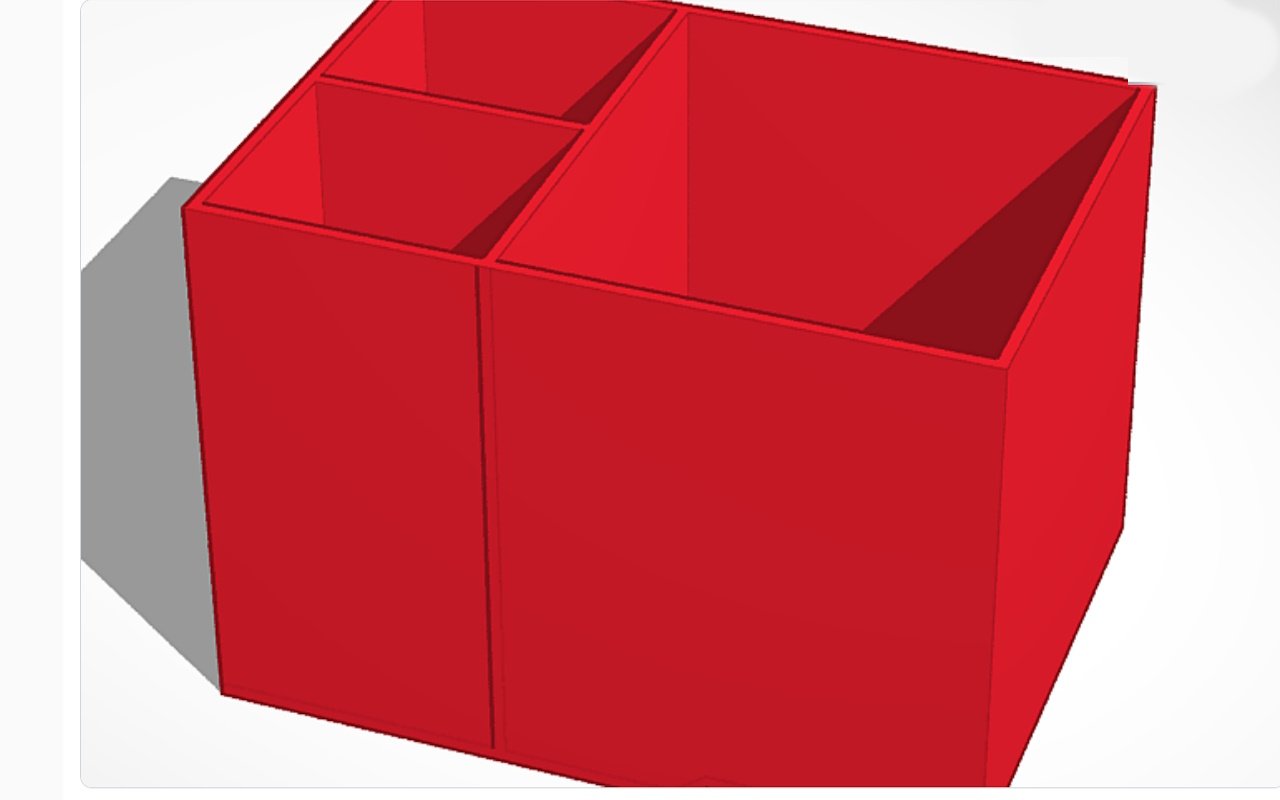
Charging Box: Organizer for Cords, Phones, Batteries
Charging cords and spare batteries seem to multiply like bunnies. We have them for phones, GoPros, camcorders, drone, security cameras and other devices. To better organize the chaos, Kasie designed this 3D-printed charging bank organizer. The drawers are filled with the spare batteries and their charging devices.

Drawers for Charging Box


Charging Box Drawer Receptacle
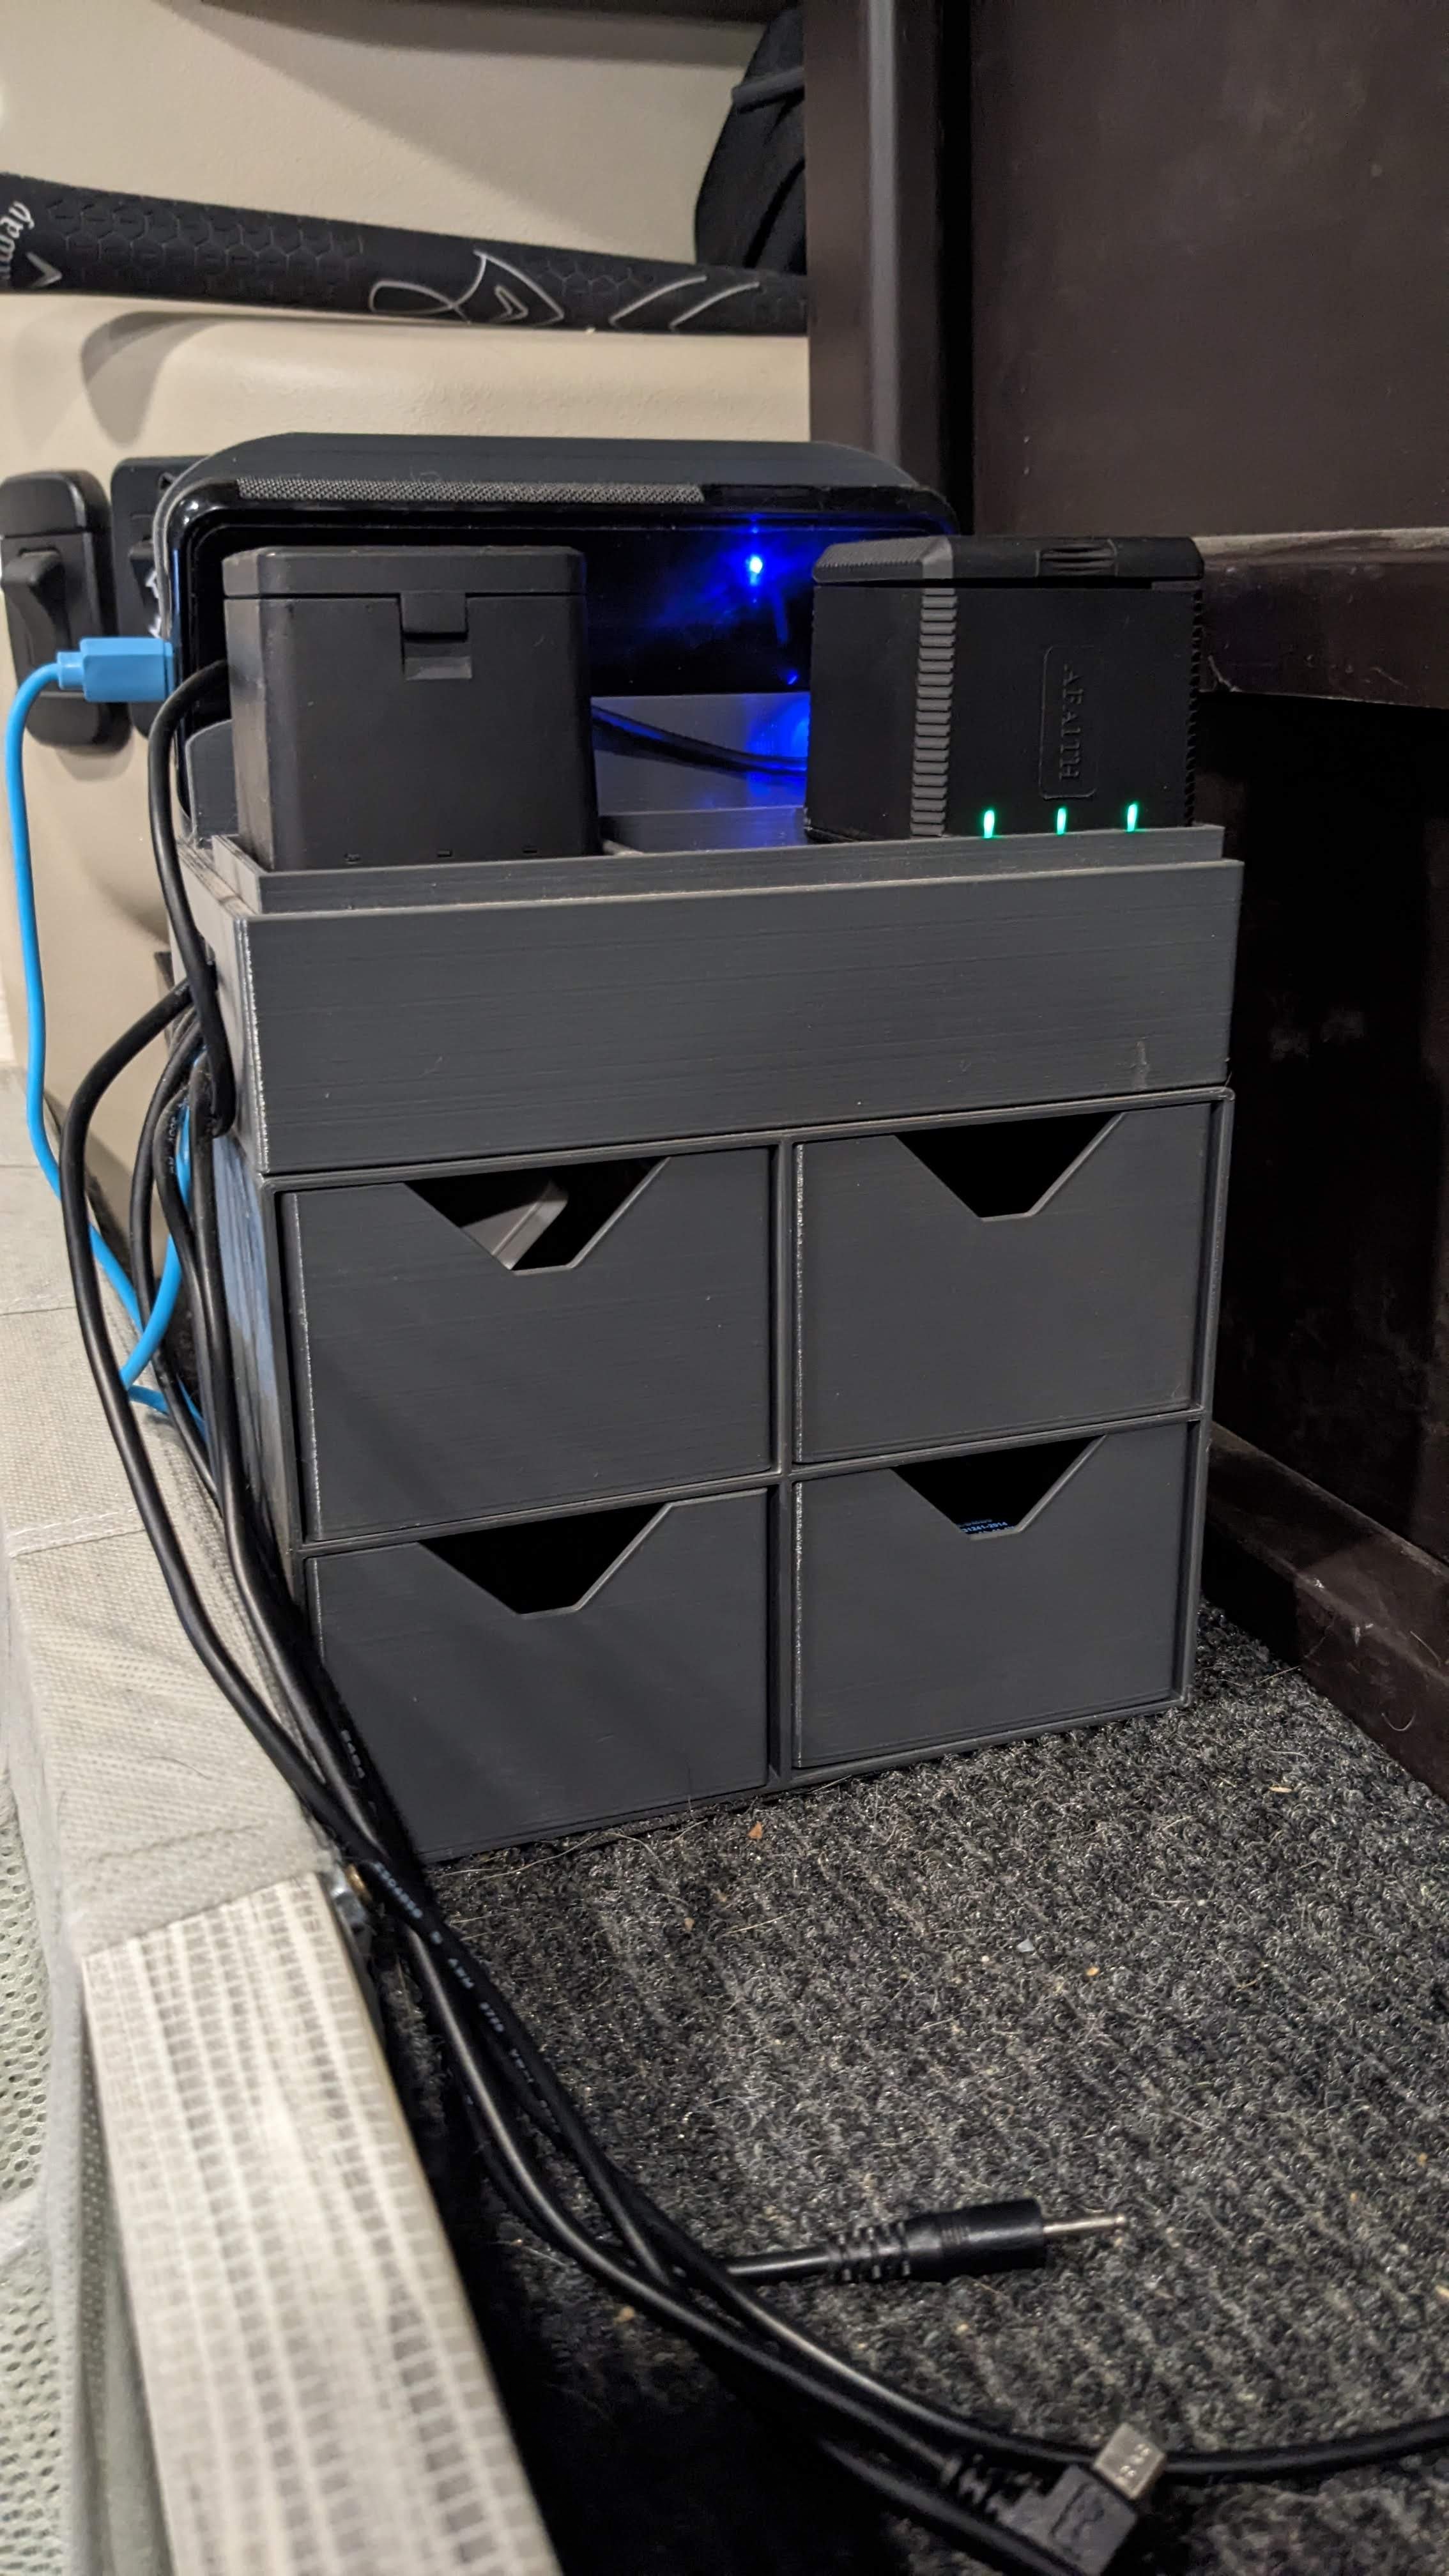
3D Printed Organizer for charging cords and spare batteries (and their chargers)
Clip / Carabiner (for securing our pet fence to lattice)
As noted above, we RV with five dogs. Whenever we can, we set up a pet fence around our campsite. One problem is that the metal pet fence is too tall such that the panels won’t fit underneath the RV door. In that area, we’ve custom-cut a couple of sections of plastic lattice that fit snuggly underneath and around the RV door. The plastic lattice is fastened to the wire pet fence with these 3D-printed carabiners. In my opinion, the 3D-printed carabiners are much easier to use than regular carabiners because they are sized just right.

Clip / Carabiner-like clip. We use this to hook our dog fencing to the lattice under our stairs.
Click on the image above for the .STL file


Of note, these clips / carabiners are handy for other things too. Kasie found this design basic design from Mr. Dooo on Thingiverse (shared under CC-BY 4.0).
Closet Rod End Cap
We don’t have a lot of hanging clothes so we decided to use a small part of our bunk area for those. We didn’t want the closet rod to extend the entire length of the bunk. Kasie 3D-printed this closet rod end to keep the closet rod from moving latterally. The rod is also secured by a metal bracket screwed into the top of the bunk area. Kasie modified a design from Thingiverse from mmerrill80 (CC-BY 4.0)

Closet rod end cap (3D Printed)
Click on the image above for the .STL file.

We have a very small space for hanging clothes in the top bunk area of our RV.
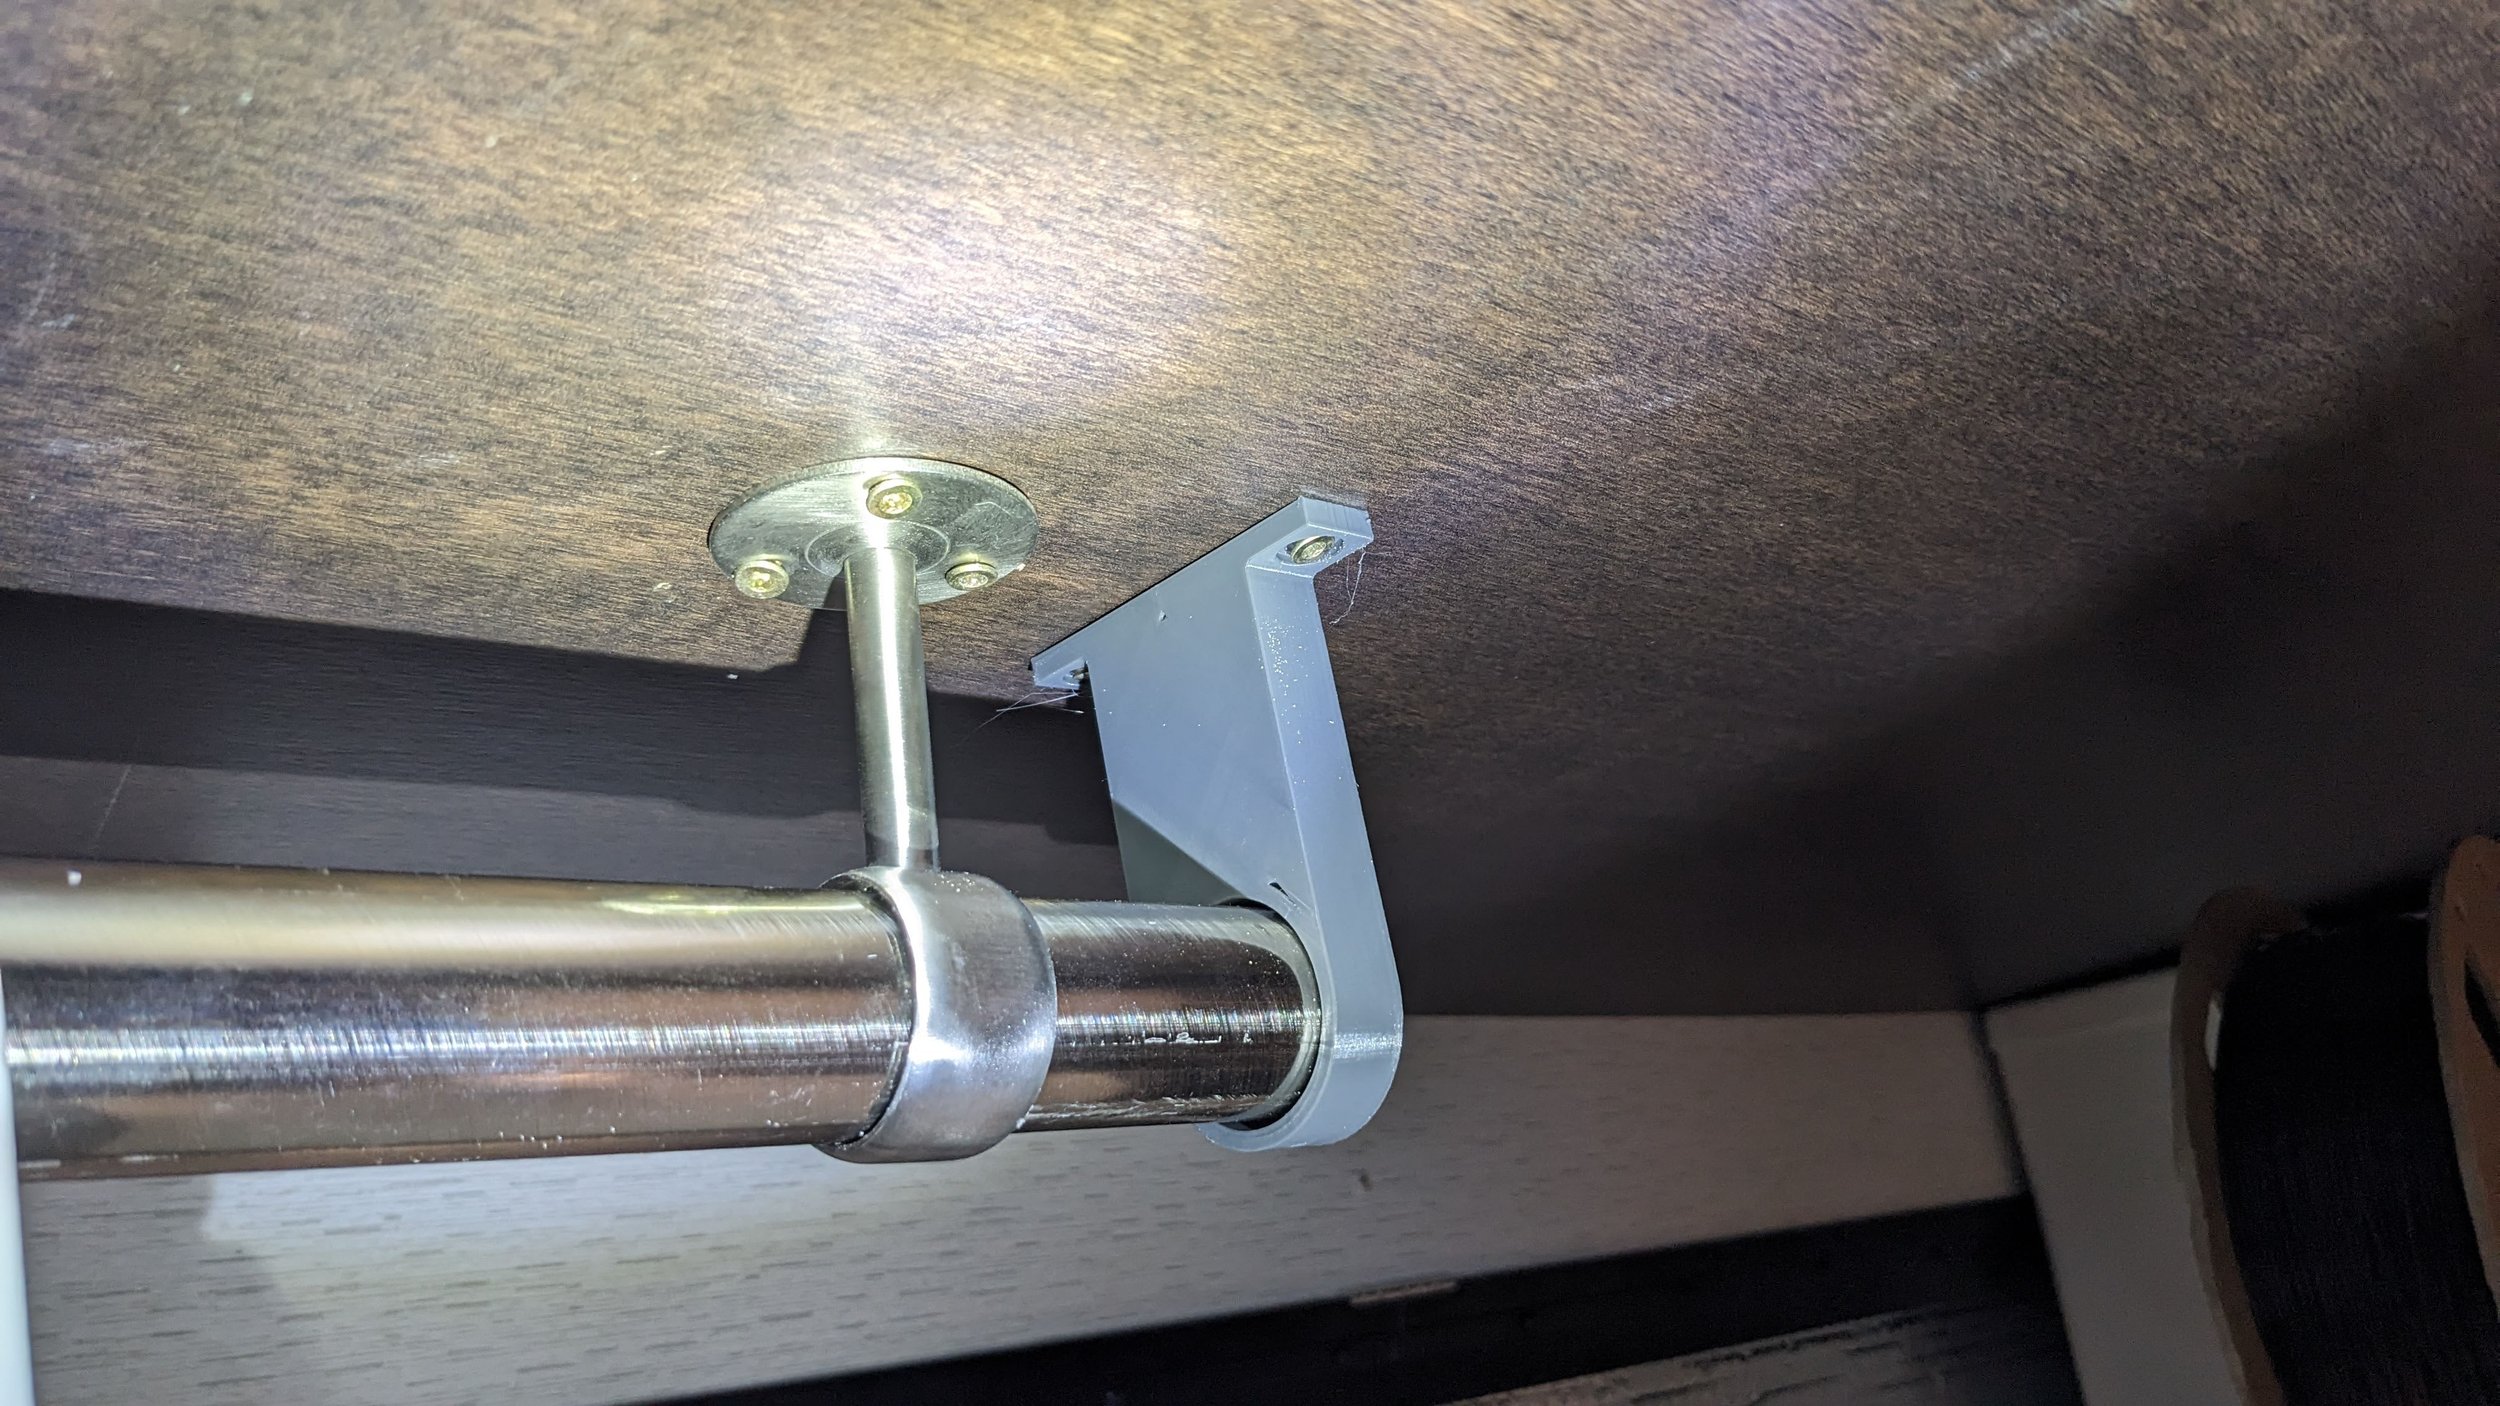
3D printed closet rod end the bunk bed area of our RV.
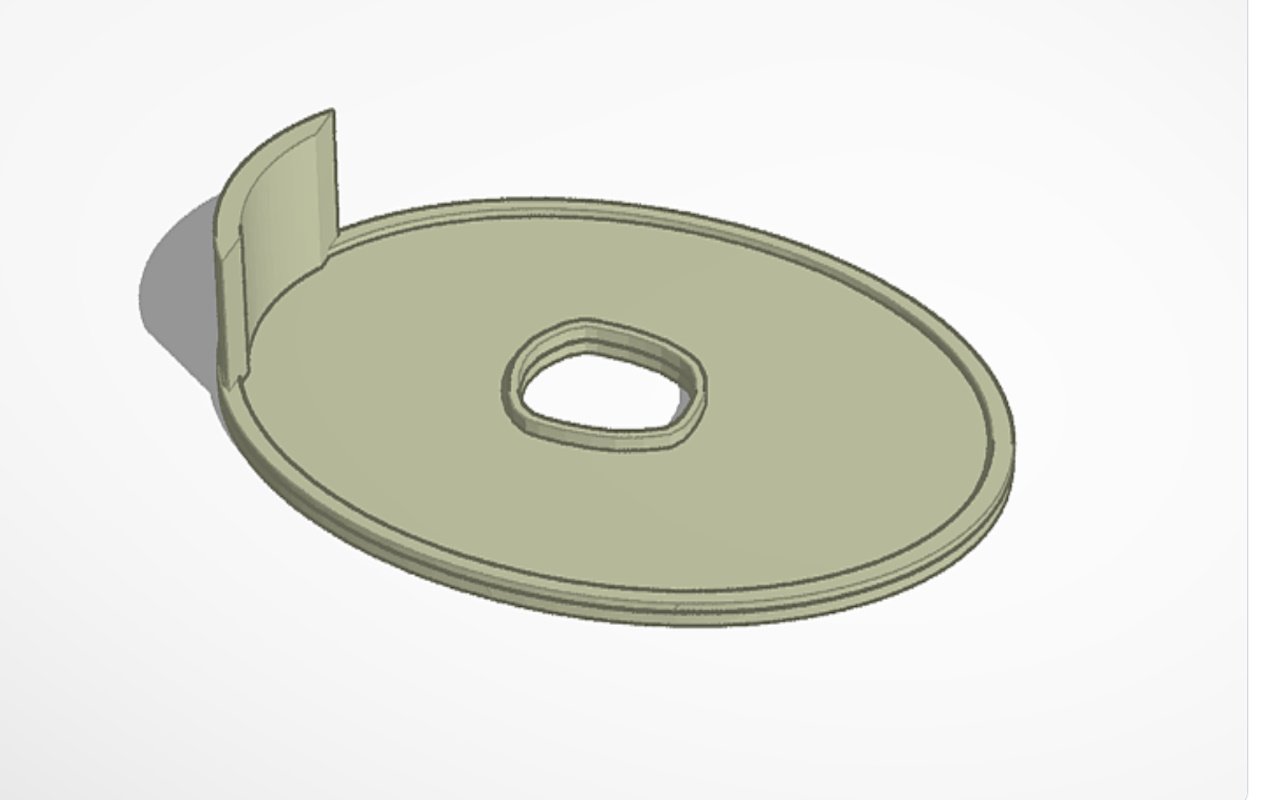
Cup Holder Ring Adaptor
Cup holder / RIng Adaptor (3D printed)
I’m not sure why, but many of the cup holders (in the console, in the sofa) in our RV are just too wide. Our drinks tend to wobble around in them. Dave Jensen on the Renegade Facebook page posted the design and the .STL file. That’s another thing about 3D printing; people always seem willing to share their designs. It’s a wonderful community!
Cup Holder / Snack Holder (for Cooler Lid)
We keep a cooler in the driving area of our RV. It’s basically a white-trash console.
We bought the cooler with two goals in mind: (1) to store extra soda, beer, and other drinks that don’t fit in the refrigerator and (2) to hold our drinks with the cup holder in the cooler lid on travel days. The problem is that the cup holder was a little too shallow and wide such that our water bottles would topple over on a bumpy road. To solve this problem, Kasie 3D-printed this combination cup holder / snack holder that fits snugly into the cup holder of the cooler lid. The cup holder portion is fairly deep and is sized to our water bottles so that our drinks don’t topple over as easy. And, we get a snack holder as well!

Cup Holder / Snack Holder (3D Printed)
Click on the image above for the .STL file.

Cup / Snack adaptor fits into the cup receptacle of a cooler

Cup / Snack adaptor fits into the cup receptacle of a cooler
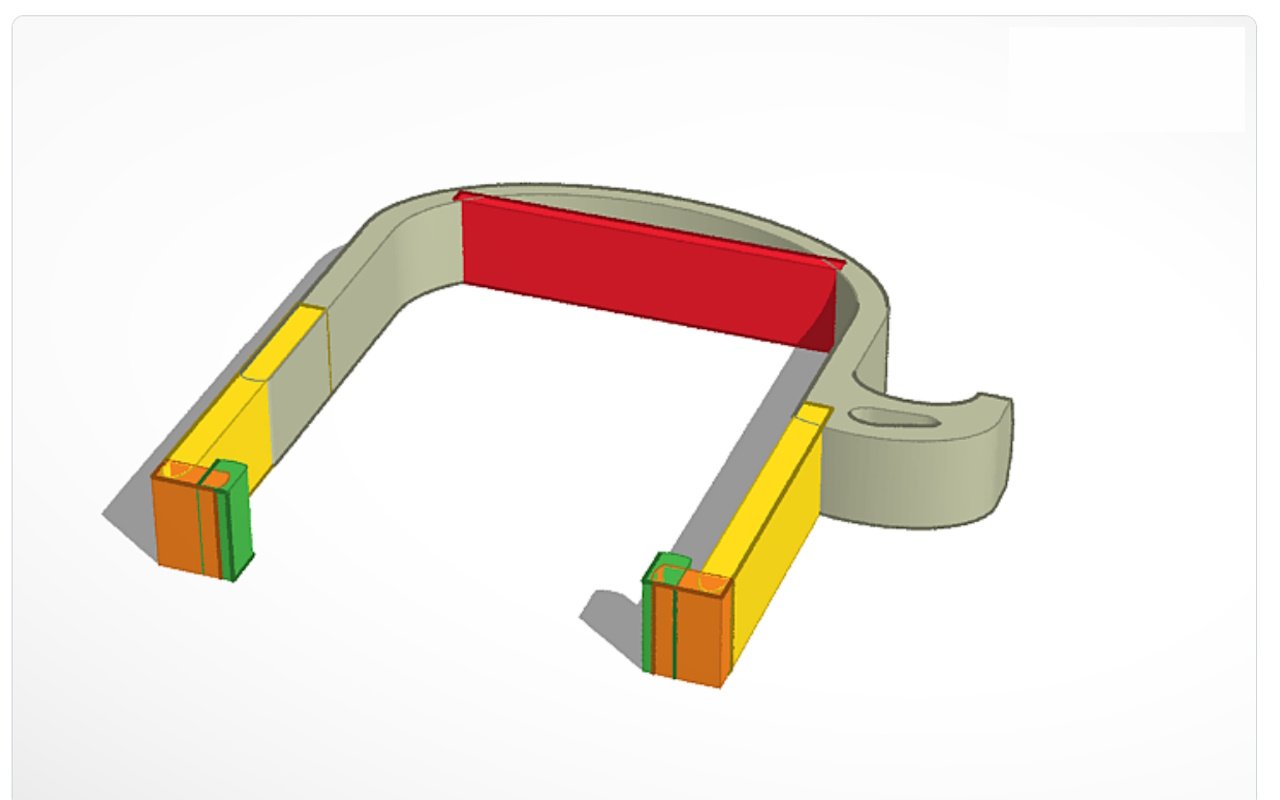
Fan Extender (for short people!)
Most RVs have an exhaust fan in the bathroom. Unfortunately, the knob to open the exhaust fan is on the RV’s ceiling so that many people have to stand on something (like the toilet) to turn on the bathroom fan. Because I’m vertically challenged, this “fan extender” is MY FAVORITE thing that Kasie ever 3D printed.
Kasie got the basic idea from Brian Miller in the Jayco Seneca Facebook group. Because the fan extender is so long, it had to be made in sections (at least with the Ender 3). The print project includes three parts: (1) a bottom section that you grab onto to turn the knob, (2) a middle section, and (3) an adaptor (in red) that is customized to attach to the exhaust fan knob.

The three sections of the fan extender.

The bottom portion of the 3D-printed fan extender.

Fan extender - Middle Section (3D printed)

Top section of the 3D printed Fan Extender. This attaches to attaches to the fan knob.

Exhaust fan handle / knob extender (3D Printed)

Close up of the exhaust fan handle / knob extender (3D Printed)

The type of adaptor needed will vary depending on the fan knob. In our old RV (a 2019 Jayco Greyhawk), the knob was cog-shaped. As such, we used different design which is shown above (click on it for the .STL).
Funny Fact: Kasie 3D printed a fan extender for some friends. They affectionately call the device “THE KASIE.” I think it’s hilarious that they think of Kasie every time they have to take a sh*t.
“Feet” for Cutting Board
Like many RVers, we have an induction cook-top, which takes up a lot of usable kitchen counter space. We place a cutting board over the cook-top to provide us with a larger kitchen prep area. We originally used some rubber bumpers (like the ones shown here) to raise the cutting board above the cook-top surface, but those rubber bumpers kept falling off. Kasie decided to design these 3D-printed “feet,” which are screwed into each corner of the cutting board.

These “feet” are attached to a cutting board that sits over the induction cook-top in our RV
Click on the image above for the .STL file
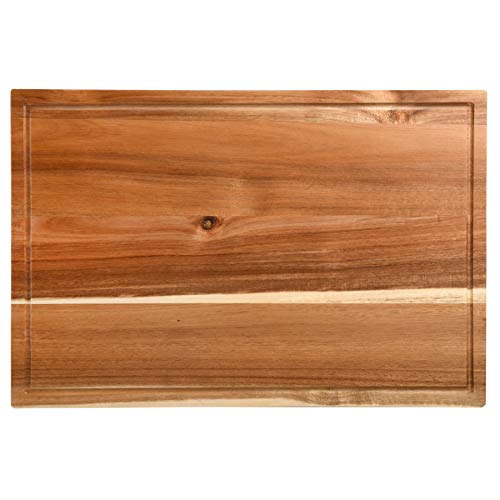

We added four 3D-printed feet to this cutting board, which lays over our cook-top to provide more kitchen prep space.

Cutting board “foot”
Hook for Over the Shower Door
Places to hang things in an RV are are always great. While 3M Command Hooks are usually a great option, they all have flat adhesive backs that require a corresponding flat service to adhere to. Unfortunately, some surfaces, like our shower door frame, are contoured so that 3M Command Hooks don’t work very well.
So what do you do? 3D printer project to the rescue!
Below is a towel hook that Kasie designed to fit over our shower door frame. It may be a little hard to tell from the photo, but there’s a slight contour to the surface shower door frame’s surface.
Hook that hangs over our shower door
Click on the image above for the .STL file.

3D-printed hook in use on our shower door.
Level Bracket
Level. Level. Level. We take great care to make sure that our RV is properly leveled each time we set up camp, and we have a 9-step process that we follow. One of those steps includes checking whether the RV is level with an old-school three-foot level. Because we use the level so often, we wanted to store the level somewhere inside where we could easily access it. Our bunk area is the perfect place to store the level.
Kasie 3D printed two level brackets to make sure that the level stays in place on travel days (and isn’t otherwise in our way when we are stationary).

Click on the image above for the .STL file.

Removable level brackets hold our 3-foot level in place.
Want to more about how we level our RV? Check out our video above.
Medicine Cabinet Cubbies / Medicine Cabinet Organizers
The medicine cabinet in our RV came from the manufacturer with one shelf. ONE. Uno. Eins. Jeden.
No matter what language you speak, ONE shelf is not enough. Moreover, we quickly learned that stuff in our medicine cabinet tended to shift around A LOT on travel days. To solve this problem, we added another shelf to our medicine cabinet, and Kasie 3-D printed some little cubbies (examples below) where we store all of our bottles, jars, toiletries, and cleaning products. We now make great use of the medicine cabinet’s space, and nothing falls out when we open that cabinet door!
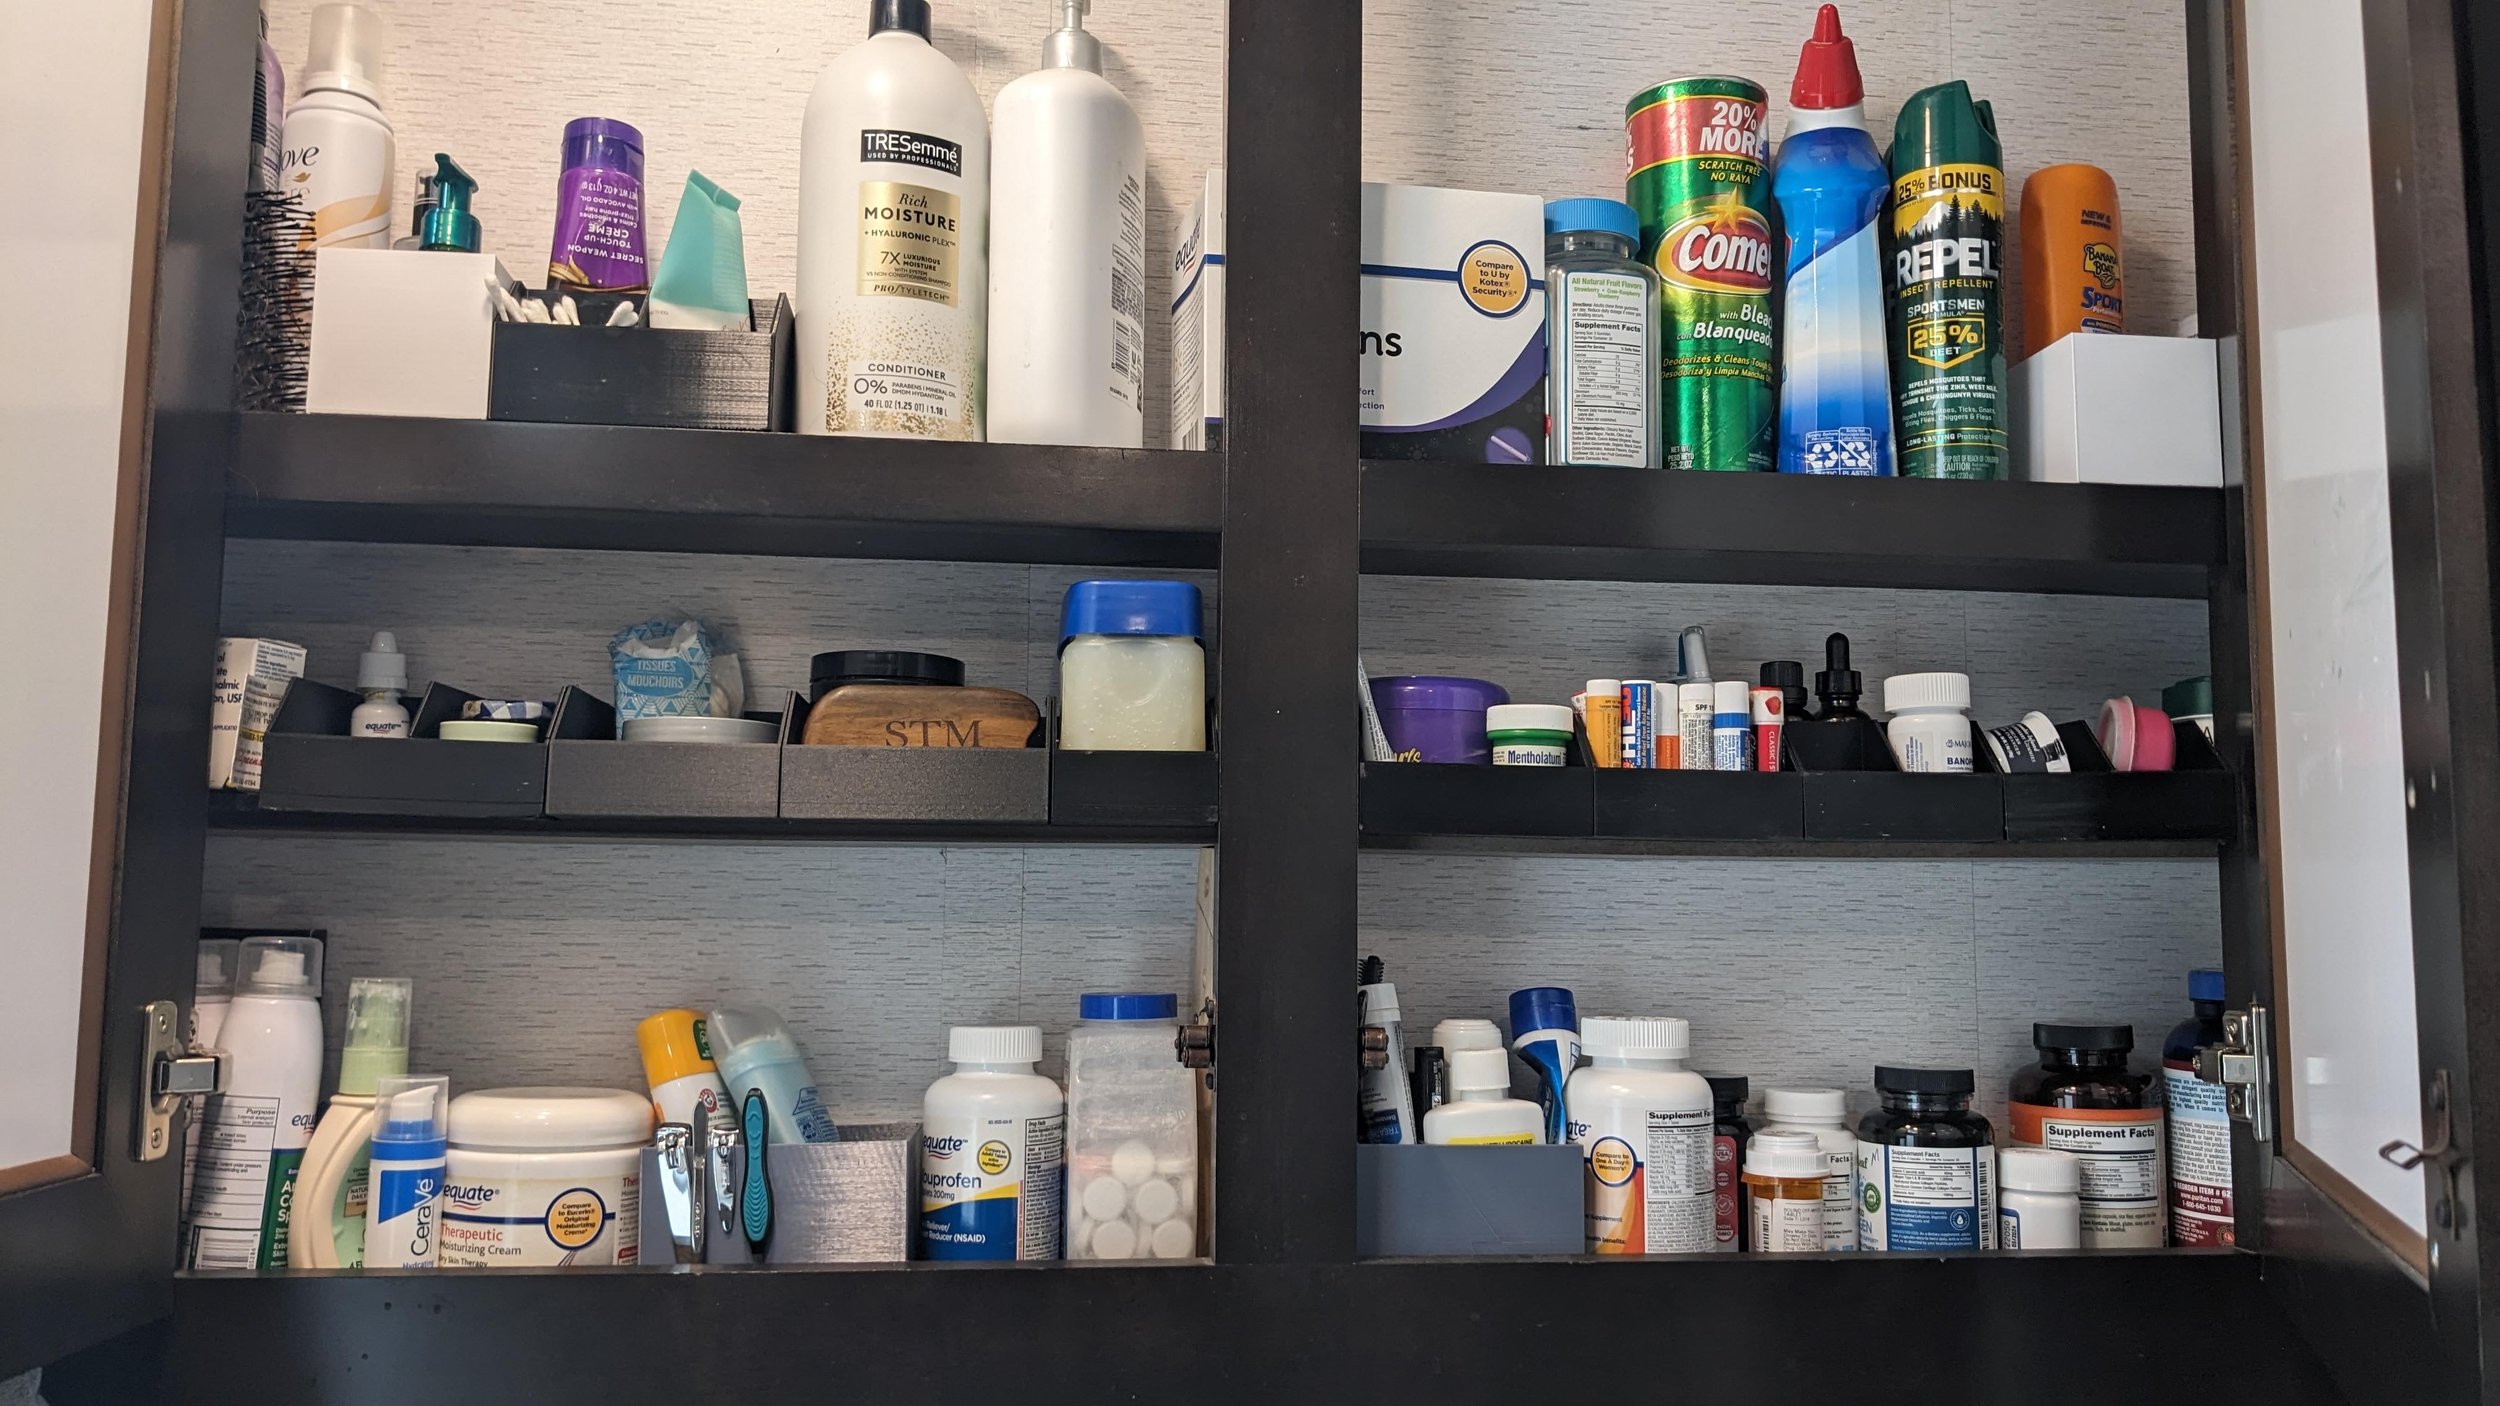
Don’t judge what we keep in our 3-D printed cubbies!


3D Printed Cubbies / Organizers in our Medicine Cabinet
I love being so organized! But please tell me why we need TWO nail clippers and TWO tweezers!
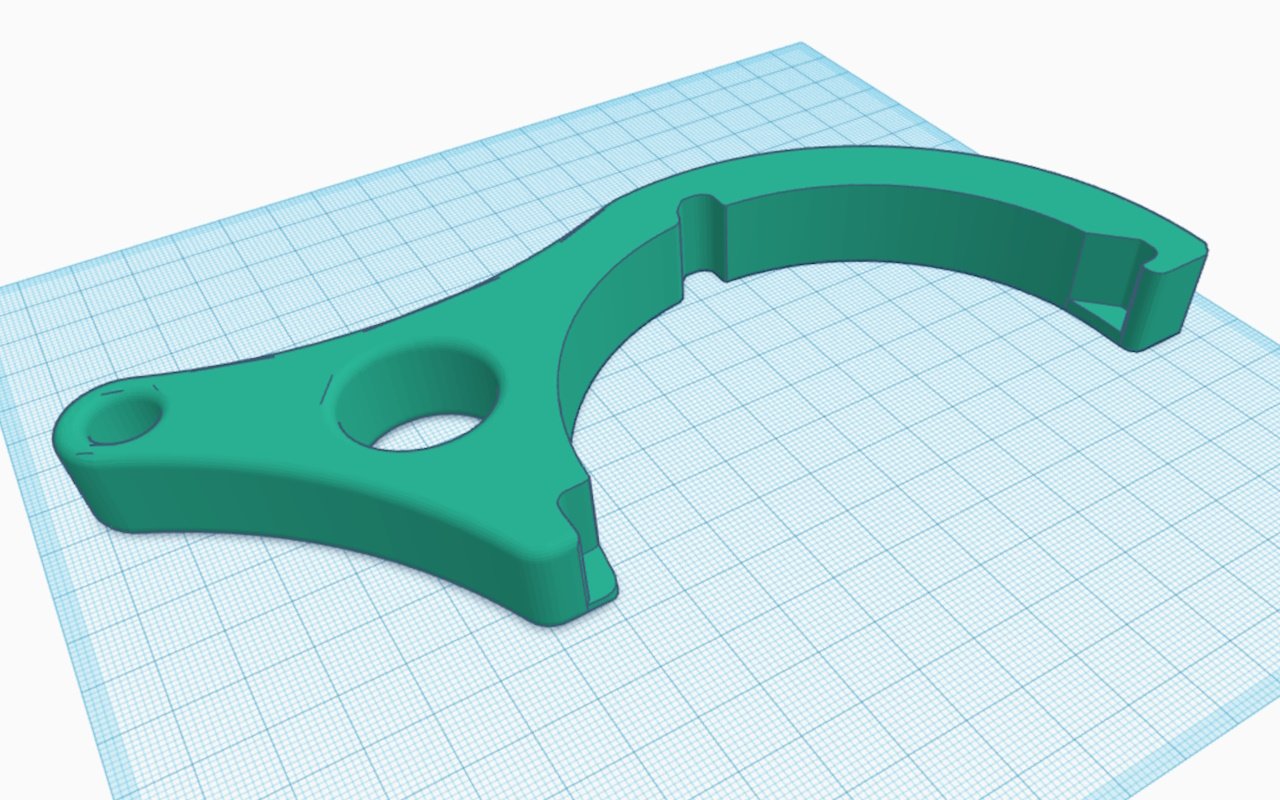
Rivets
Kasie removed the macerator from our RV, which left some holes in the bottom of the wet bay area. She 3D printed these rivets to fill in the holes.

Click on the image above for the .STL file.
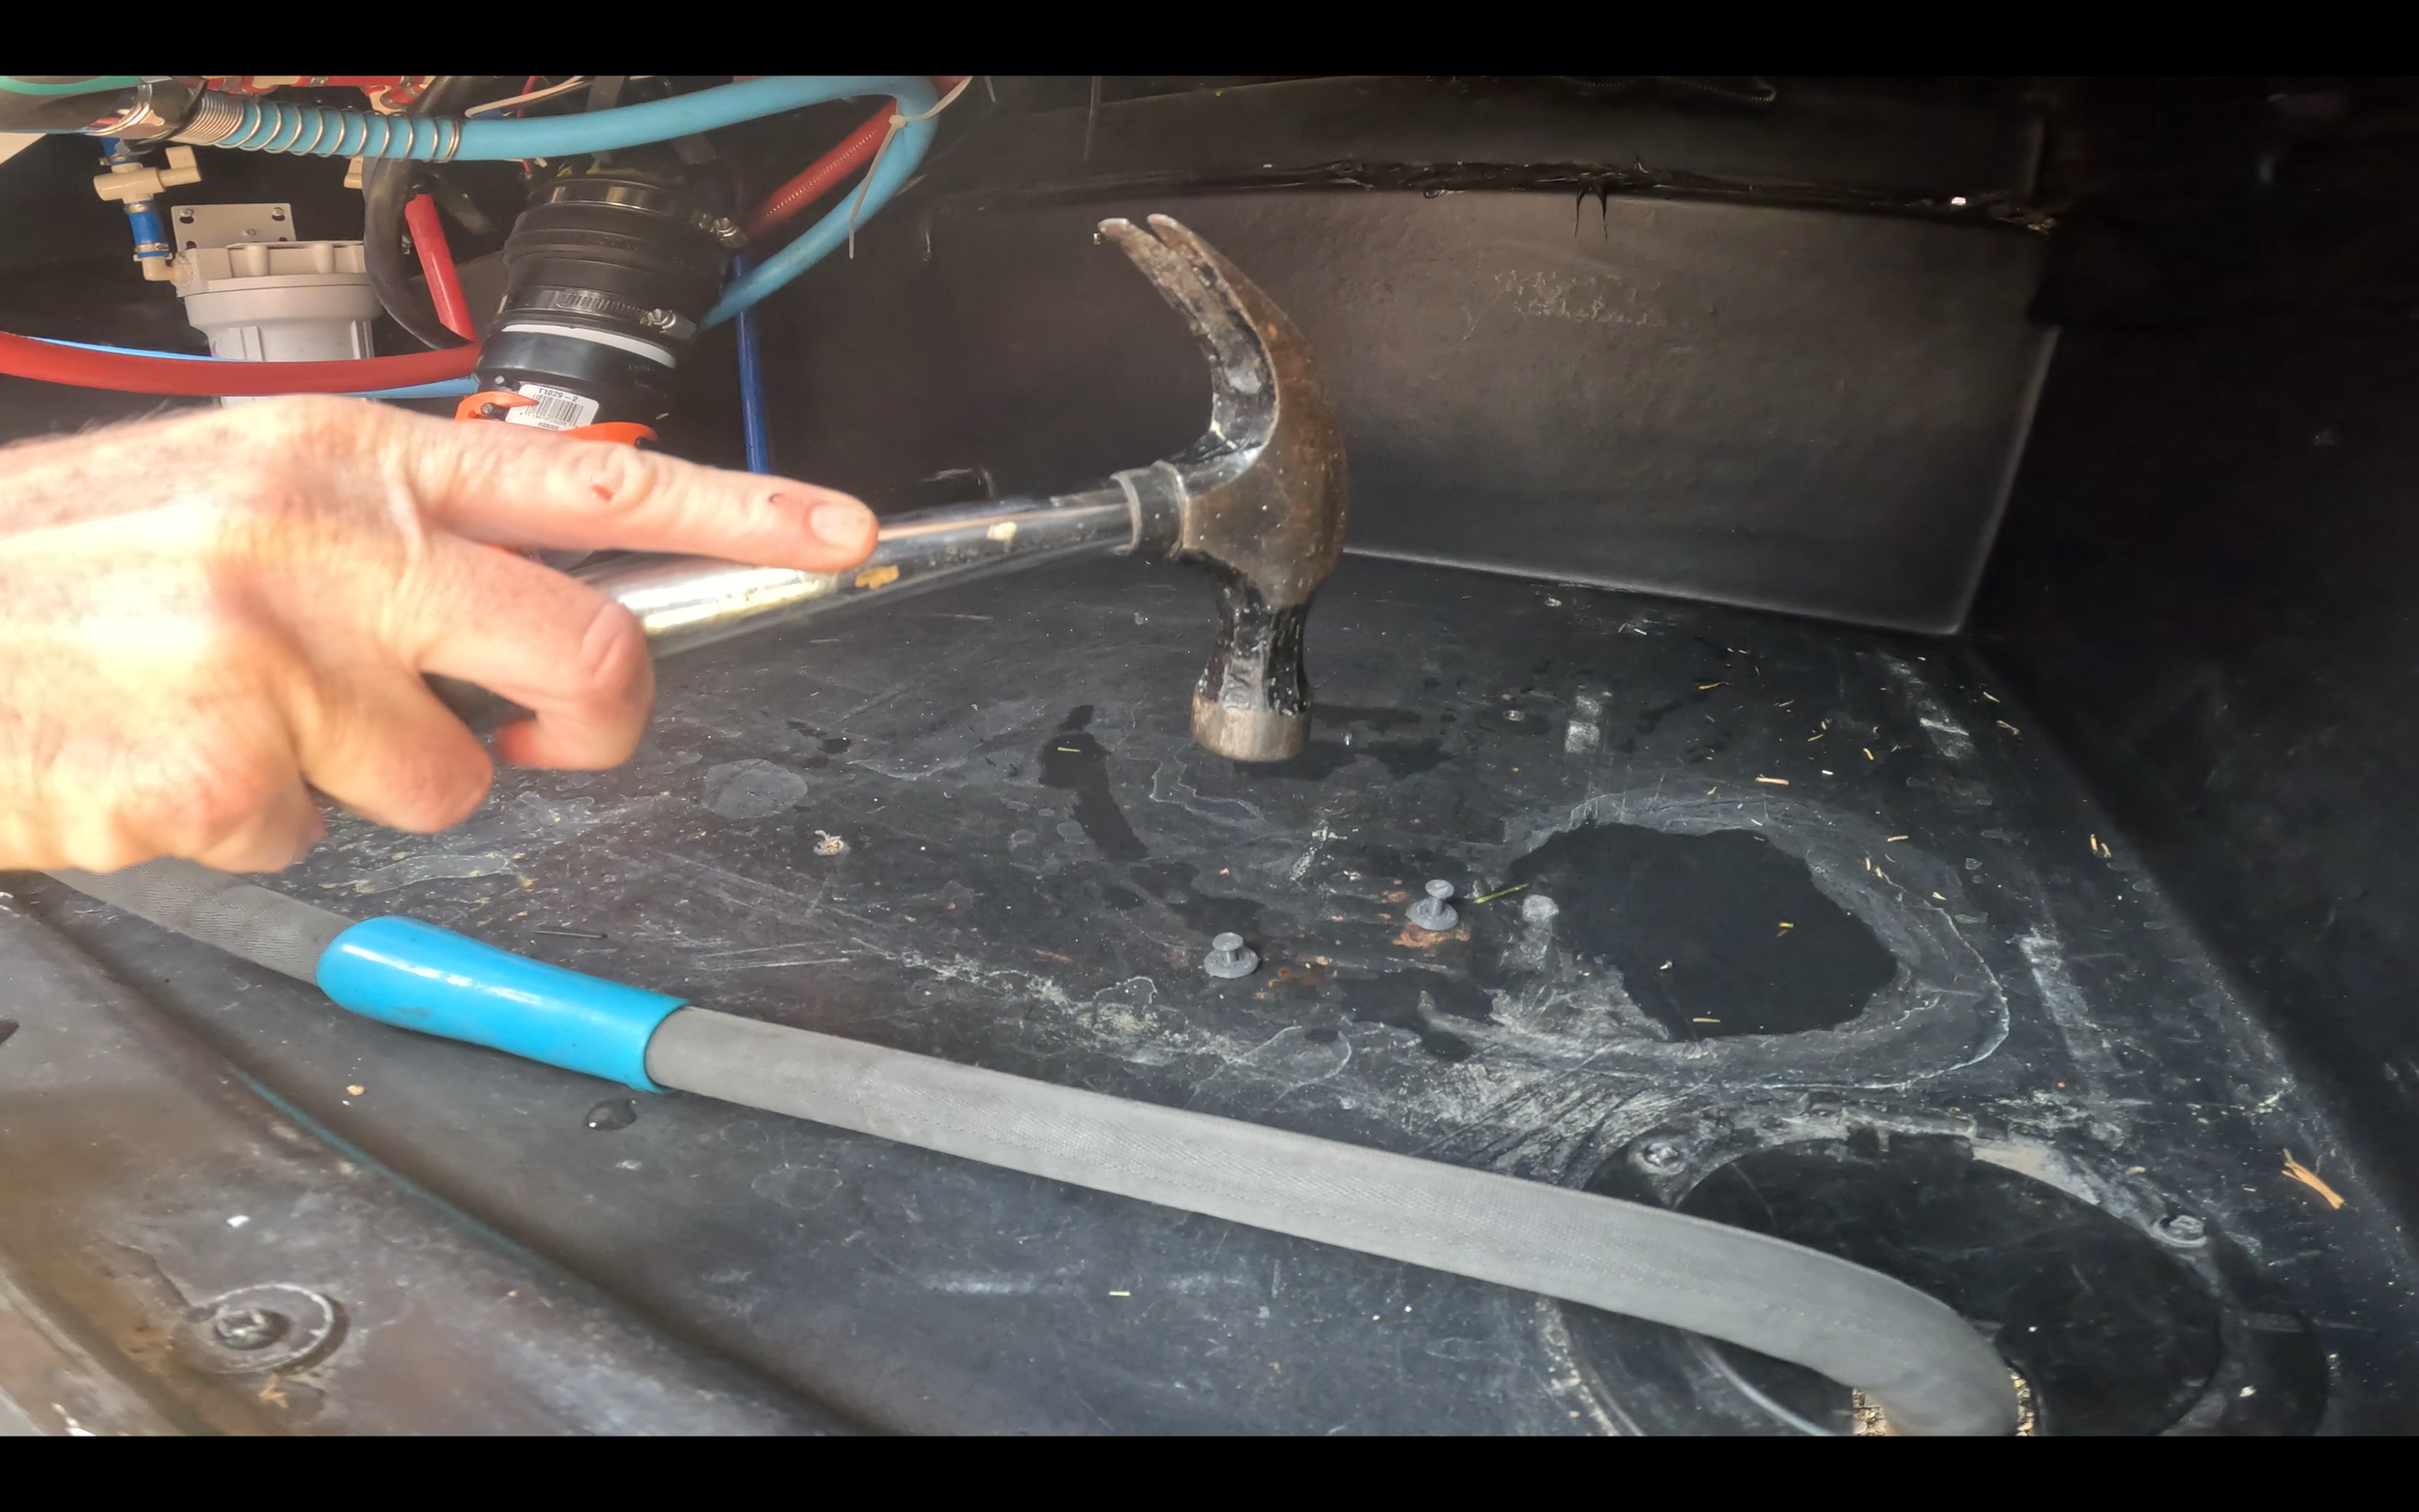
Kasie is pounding in a 3D printed rivet in the screw holes where our macerator used to be. Notice the bloody finger. Now, that’s classy.
RV AC Air Flow Device
A few years ago, Kasie decided to improve the air flow in our old RV (a 2019 Jayco Greyhawk). RV Air Flow sells a bunch of kits that cost $150 or more, but she decided to do-it-herself for a little under $20. Keep in mind that dimensions for the inserts will vary depending on the specific a/c unit that comes with your RV. The one that she used for the Greyhawk can be found here in another blog.
While 3D printing the inserts is fun, it’s worth noting that using another substrate like styrofoam is probably quicker and easier. Kasie opted for that when doing a similar a/c airflow mod to our 2022 Entegra Accolade.
Sewer Wrench
Kasie had trouble getting the sewer hose connections disconnected. She found this design from daginator on Thingiverse (CC-BY 4.0). It is similar to the Camco Rhinflex sewer wrench.
Click on the image above for the .STL file.
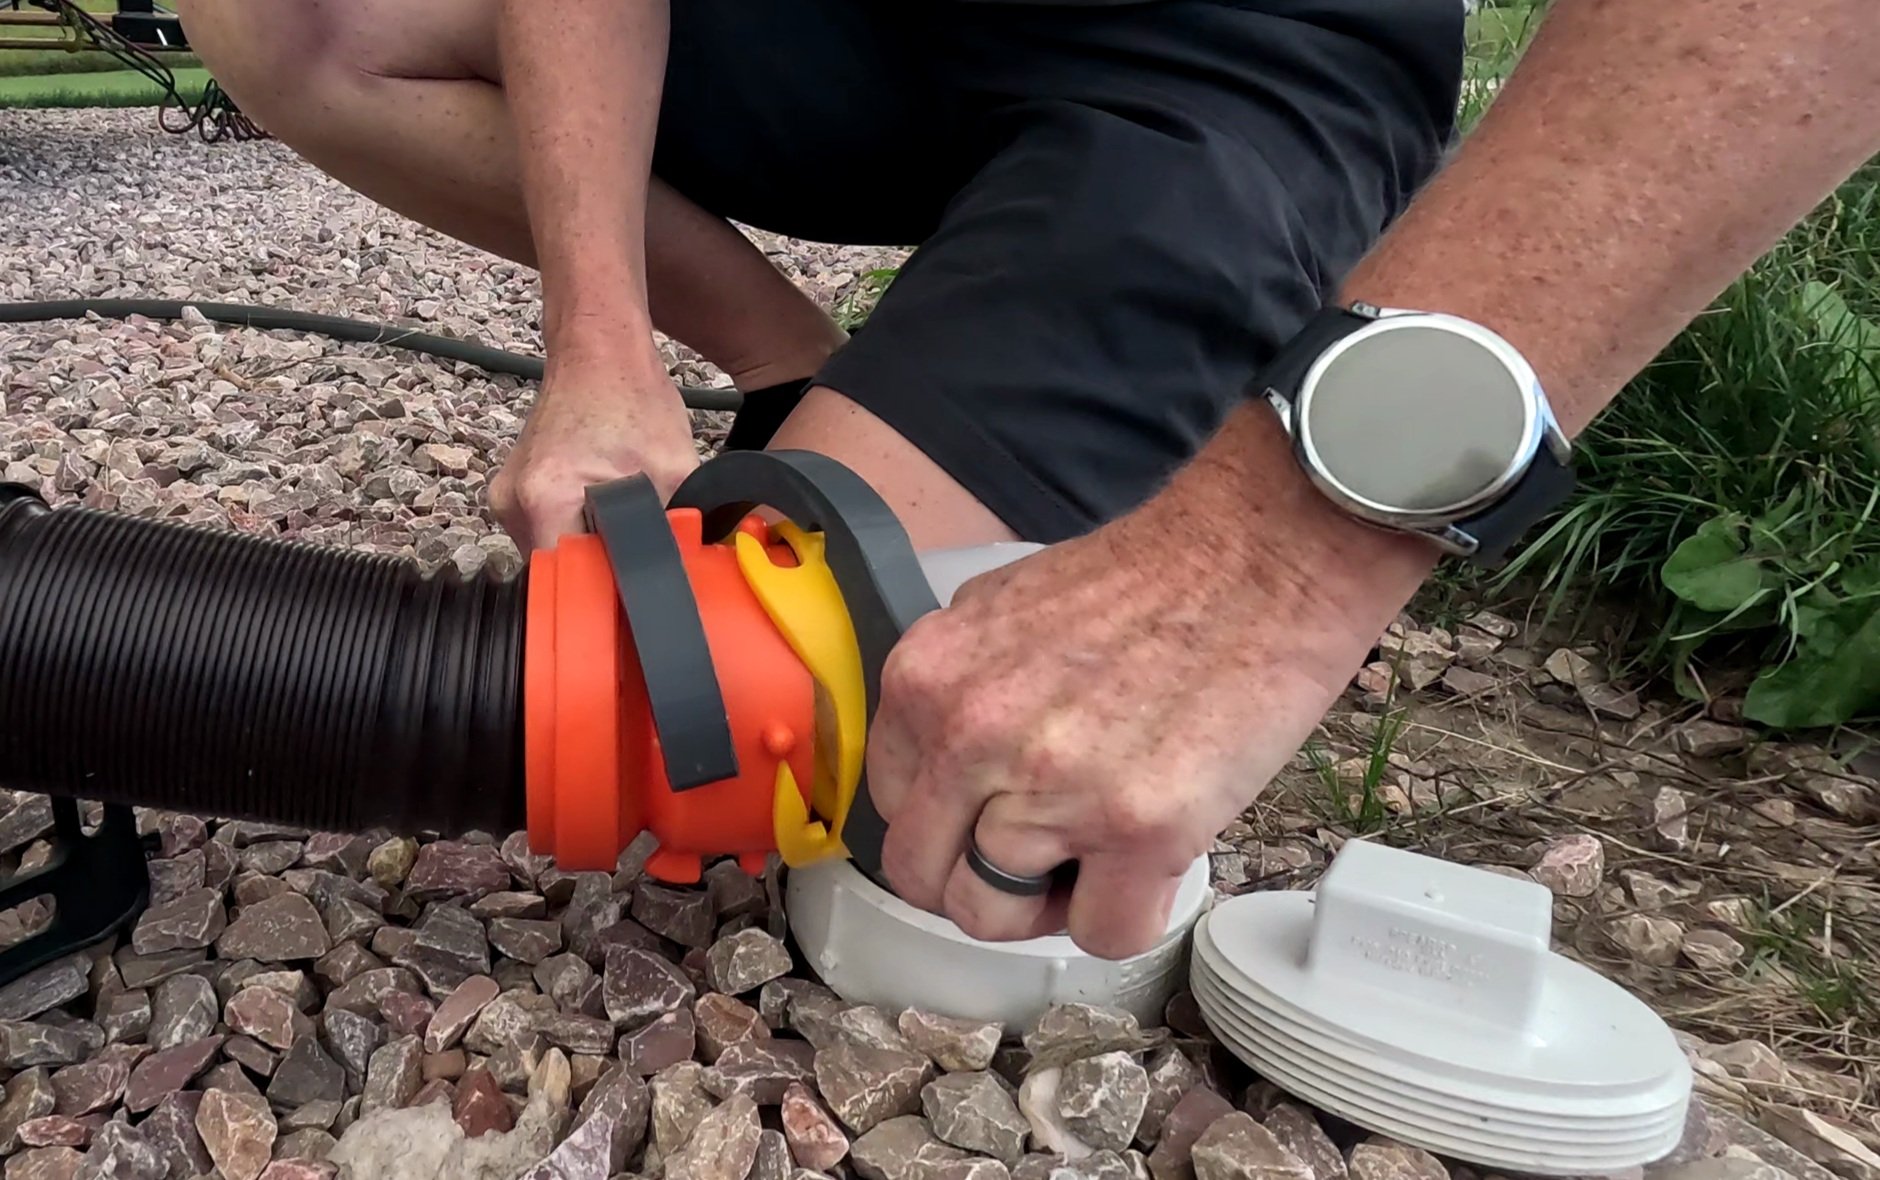
Kasie uses her 3D-printed sewer wrench

S2RV Cubby / Divider for S2RV Console
Our RV (an Entegra Accolade XL 37L) is built on a Freightliner S2RV chassis. Unfortunately, there’s no good place to store our phones an other gadgets in the driving area. Kasie create this design and 3D printed this for extra storage where the ashtray used to be.

Click on the image above for the .STL file.

This cubby / divider fits into the console of our S2RV Chassis (2022 Entegra Accolade XL)

3D Printed Organizer for our S2RV Chassis where ashtray used to be.
Starlink Clip for Ethernet Cord
Kasie was worried about our Starlink ethernet cord getting run over by a campground mower or some varmint trying to eat it. She 3D printed these clips that attach to the RV’s frame and hold the ethernet cord off the ground. Quite clever!

Clip for Starlink Ethernet Cord
Click on the image above for the .STL file.

3D-Printed Starlink Ethernet Cord Clip fastends to our RV’s frame
Tooth Brush and Tooth Paste Holder (Electric Tooth Brush)
I’m telling you, 3-D printed toothbrush and toothpaste holders are the rage. In the following design, a removable “catcher” that rests between the electric tooth brush and the 3-D printed base or the charger (see red arrows). The idea is that the water / tooth paste mixture that inevitably runs off the tooth brush flows into the “catcher” so that the base stays relatively clean.


3D printed tooth brush and tooth paste “base”
This toothpaste catcher rests between the toothpaste holder and the electric tooth brush. The idea is that you only have to remove this for cleaning.
Your RV (But it’s hard!)
One of Kasie’s first 3D printing projects was to print a model of our RV, which was then a 2019 Jayco Greyhawk 31F. The project was challenging because she started with a Ford F150 model and then built the rest around it. She printed some of the components (like the wheels and ladder) separately. She made over a dozen itterations of the design, and frankly, we’re not sure which ones she actually used for the final print job so I’m not including the .STL file for this one. The video below shows the printing process.

As part of researching for this blog, I decided to make a 3D drawing of our 2022 Entegra Accolade XL 37L in Tinkercad. I started with a container semi-truck from SirSpankie (CC-BY 4.0), cut it up to use for most of the Freightliner chassis, and then built the Jayco portion pretty much from scratch. I think it turned out nicely on the computer. But getting it to print is another story….

Drawing of a 2022 Entegra Accolade XL 37L (same as a Jayco Seneca Prestige 37L) for 3D Printing
Like Kasie, I’m going to have to deconstruct some of the components and print them separately. But this was a fun project, and got me hooked!
DISCLAIMERS: PLEASE DO YOUR OWN RESEARCH. WE ARE NOT RESPONSIBLE FOR YOUR RIG! We are NOT affiliated with any of these products and just want to share our experiences about these 3D printing projects. We do get a very small commission at no cost to you if you use one of the Amazon Links (a/k/a beer money).